Gum Grafting: What Actually Happens Before, During, and After
“Gum surgery” tends to sound a lot more intense than what a gum graft procedure actually involves for most patients. I get it — anything involving the word “surgery” near your mouth understandably raises the anxiety level. But once patients understand what’s actually happening, why it’s needed, and what recovery genuinely looks like, most of that anxiety settles considerably. Let me walk through the real process, from the evaluation beforehand to what the weeks of healing actually feel like.
Who actually needs a gum graft
Gum grafting addresses gum recession that’s already happened — exposed root surfaces that won’t cover themselves back up on their own, since gum tissue doesn’t regenerate the way some other tissue in your body does. Patients typically end up considering a graft for one or more of these reasons: sensitivity from exposed root surfaces that hasn’t responded to desensitizing toothpaste, a cosmetic concern about a smile where the gumline looks uneven or teeth appear longer than they used to, or a periodontist’s recommendation to add protective tissue before recession progresses further or puts a tooth at greater long-term risk. Some patients are also recommended a graft preventively — not because recession has caused a problem yet, but because their gum tissue is naturally thin in a way that puts them at meaningfully higher risk of recession accelerating in the future, particularly around teeth planned for orthodontic movement or an upcoming restoration.
It’s worth being clear that grafting addresses the tissue itself — it doesn’t address whatever originally caused the recession. If aggressive brushing, untreated gum disease, or grinding drove the recession in the first place, that cause needs to be addressed alongside the graft, or the same forces will simply threaten the newly grafted tissue too.
The three main types of gum graft
Connective tissue graft (CTG) is considered the gold standard for covering exposed roots. Tissue is taken from underneath the surface layer of the palate — rather than the surface layer itself — and placed over the receded area. Because this deeper layer of tissue closely matches the color of the surrounding gum, CTG typically blends in the most naturally of the three options, and current research consistently ranks it highest for both root coverage and aesthetic outcome.
Free gingival graft (FGG) takes a thin layer of tissue directly from the surface of the palate and stitches it over the area needing more gum tissue. This technique is particularly effective for building up thickness in areas with very little existing gum tissue, though it doesn’t always blend in color as seamlessly as a connective tissue graft, since it’s a different type of tissue layer than what typically shows on the surface elsewhere in your mouth.
Pedicle graft uses gum tissue from right next to the affected area rather than from the palate at all, sliding it over to cover the recession while keeping it attached to its original blood supply. Because the tissue never fully detaches, healing tends to be faster and more comfortable, but this option only works when there’s enough healthy gum tissue immediately adjacent to the recession to use.
Did You Know
Clinical research consistently identifies the connective tissue graft, combined with a coronally advanced flap technique, as the gold standard for treating gum recession, citing both higher rates of complete root coverage and better color matching compared to a free gingival graft. Gum grafts overall carry a success rate well over 90% when the underlying cause of recession is also properly managed.
What happens before the procedure
A real evaluation starts with identifying why the recession happened in the first place, since that shapes both whether a graft makes sense yet and what needs to happen alongside it. If gum disease is present, it needs to be treated first — placing a graft into inflamed, untreated tissue undermines the whole procedure. If aggressive brushing or an ill-fitting retainer is the driver, that habit or appliance needs to be addressed so it doesn’t threaten the new tissue the same way it threatened the original. Your periodontist will also assess how much recession is present, how much healthy tissue is available nearby, and which of the three graft types actually fits your specific case, since this isn’t a one-size-fits-all decision. This evaluation typically includes measuring the width and thickness of your existing gum tissue at the affected sites, which directly informs whether a pedicle graft has enough adjacent tissue to work with or whether tissue needs to come from the palate instead.

What actually happens during the procedure
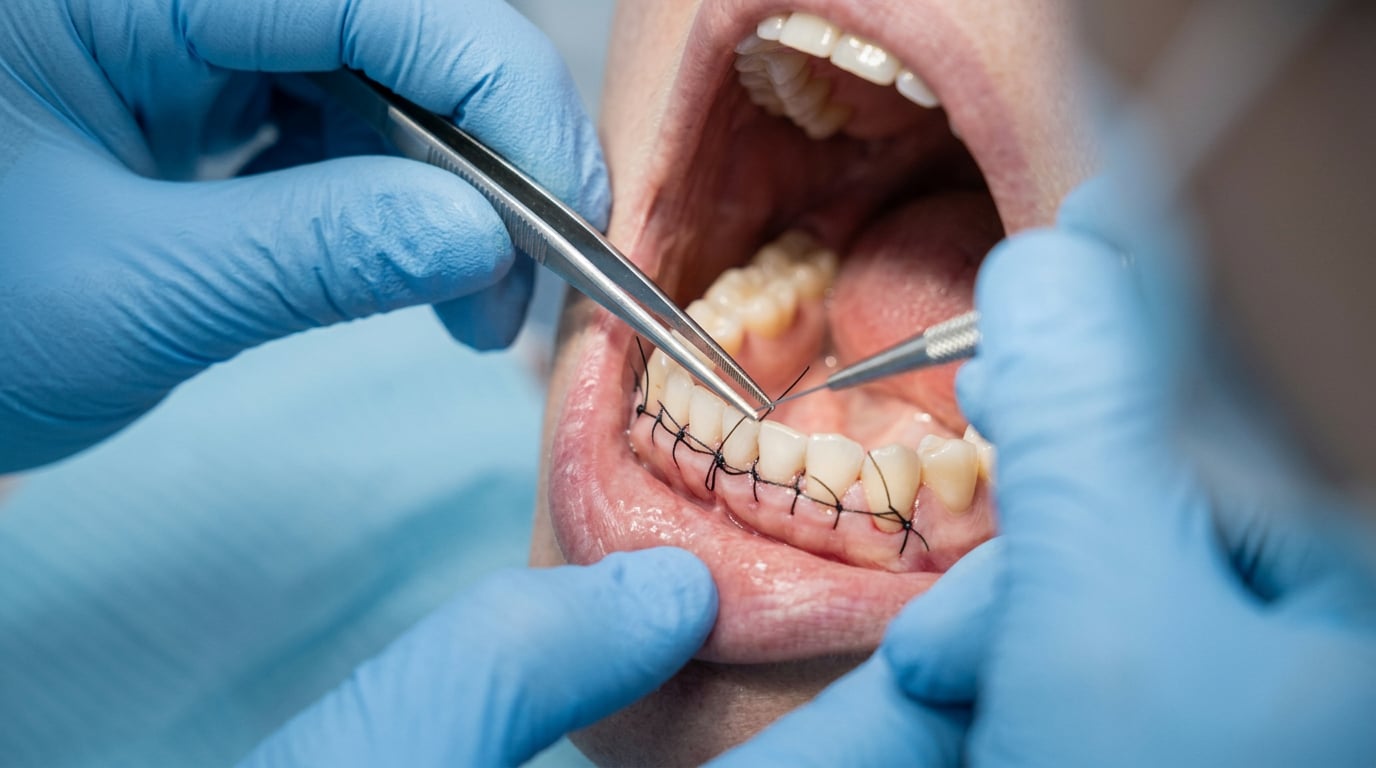
The area is thoroughly numbed with local anesthesia, and for patients with significant anxiety, sedation is often available as an option. For a connective tissue or free gingival graft, a small piece of tissue is taken from the palate through a precise, controlled incision, then placed over the receded area and secured with sutures. For a pedicle graft, nearby gum tissue is carefully repositioned and sutured into place instead. Depending on how many teeth are being treated, the entire procedure typically takes about one to two hours.
Worth Knowing
If tissue is taken from your palate, that donor site is often what patients notice most during early recovery — many describe it as feeling similar to a burn from hot food, more so than the grafted area itself. This is normal, temporary, and generally responds well to the recovery steps below, but it’s worth knowing about in advance so it doesn’t come as a surprise.
What recovery actually looks like, step by step
The first 24 to 48 hours typically involve the most noticeable swelling and tenderness, managed with over-the-counter pain medication for most patients. A cold compress against the outside of the face in short intervals helps manage swelling during this window. Strenuous activity is generally avoided for the first day, and most patients take it easy rather than returning immediately to a full workday, though this varies by individual comfort and the extent of the graft.

The first week calls for a soft diet — think eggs, yogurt, mashed potatoes, and soup — avoiding anything crunchy, spicy, or hard that could disturb the healing tissue or the sutures. Gentle rinsing as directed, rather than vigorous brushing directly over the surgical site, protects the graft while it’s most vulnerable. If tissue was taken from your palate, a protective dressing is sometimes placed over that donor site for the first several days to improve comfort while it heals.
Weeks two through four bring a gradual return to normal eating and oral hygiene around the area, guided by your periodontist’s specific instructions based on how healing is progressing. Most patients are back to their full regular routine well within this window.
Full tissue maturation continues for a few months beyond that, even though the visible healing looks essentially complete much sooner. The color and texture of the grafted tissue continue to refine and blend in during this longer window.
What to watch for
Mild bleeding, swelling, and tenderness are expected in the first few days and not cause for concern on their own. It’s worth contacting your periodontist if you notice bleeding that won’t stop with gentle pressure, fever, increasing pain rather than gradual improvement, or any sign the graft tissue appears to be lifting or not integrating as expected. These are uncommon, but they’re worth catching early rather than waiting to see if they resolve on their own.
Questions that come up often
“Will it hurt during the procedure?” No — the area is fully numbed beforehand, and most patients describe the procedure itself as uneventful. Discomfort shows up afterward, during recovery, not during the appointment.
“How many teeth can be treated at once?” This varies by case, but it’s common to treat several adjacent teeth with recession in a single procedure rather than one at a time, particularly when a connective tissue graft is being used across a wider area.
“Will the graft look obviously different from my other gums?” With a connective tissue graft especially, the color match is typically excellent once healing is complete. A free gingival graft occasionally shows a slightly different texture or shade, though this is usually subtle rather than obvious.
“Can recession come back after a graft?” It can, if the underlying cause isn’t addressed — which is exactly why treating the driver of recession (grinding, brushing technique, active gum disease) alongside the graft matters as much as the surgical procedure itself.
“Is this covered by dental insurance?” Coverage varies by plan and by whether the recession is linked to a diagnosed periodontal condition. It’s worth checking your specific benefits, since grafting tied to periodontal treatment is often covered differently than a purely cosmetic request.
“How long do gum grafts actually last?” With the underlying cause managed and reasonable oral hygiene maintained, a successful graft can last indefinitely — there’s no built-in expiration the way there is with some other dental materials.
| Type | Tissue source | Best for | Aesthetic match |
|---|---|---|---|
| Connective tissue graft (CTG) | Underneath the palate surface | Root coverage; the most common recommendation Gold standard |
Excellent — blends closely with surrounding gum |
| Free gingival graft (FGG) | Surface layer of the palate | Building tissue thickness where very little exists | Good, occasionally a slightly different texture |
| Pedicle graft | Gum tissue adjacent to the recession | Cases with enough healthy tissue nearby to use Faster healing |
Very good — uses your own adjacent gum tissue |
How the three graft types actually compare
Gum grafting sounds more intense as a phrase than it typically feels as a procedure — a well-established, predictable treatment with success rates well over 90% when the underlying cause of recession is managed alongside it. The recovery has a real, if temporary, discomfort window, particularly at a palatal donor site, but it resolves within one to two weeks for most patients, with the tissue continuing to mature and blend in over the following months. If exposed roots have been bothering you, whether from sensitivity or appearance, this is a far more routine procedure than “gum surgery” tends to sound.
Washington, PA & Pittsburgh
Dealing with exposed roots or gum recession?
Dr. Wakim can evaluate which type of gum graft actually fits your case, and make sure the underlying cause is addressed too.

Dr. Elizabeth Wakim, DDS, is the founder of Enhanced Wellness. She’s a compassionate and highly-regarded dentist with her own practice in Washington, Pennsylvania, known for providing modern, comprehensive dental care, botox and facial aesthetics with a focus on patient comfort and anxiety reduction, serving general, cosmetic, and pediatric dentistry needs.